1978 Kawasaki Z650 Carburettor Synchronisation
It feels like this project to get my 1978 Kawasaki Z650 back on the road has been going on forever !
In the process, I've discovered an insane amount of issues and problems that have needed to be solved, and it's definitely been a case of "one step forward, two steps back." Not having an under-cover workshop and limited time have definitely been issues, making this something of a stop-start project.
But it's finally starting to feel like it might be almost at the point of being rideable.
Having fixed a blowing exhaust, I think I'm finally in a position to balance the carburettors. They've been totally refurbished, so it's a case of taking the settings from "factory default settings" starting position.
While they were off the bike, I did an initial mechanical synchronisation. This is a case of setting all fours slides to roughly the same position using a 1mm diameter wire. Now it's time for fine tuning the synchronisation !
First step; get all the tools I think I'll need together. I don't want to be fishing around in the toolbox looking for something in a hurry. With the bike static I only want to warm the engine up and then run it for the shortest time possible to avoid the risk of over-heating.
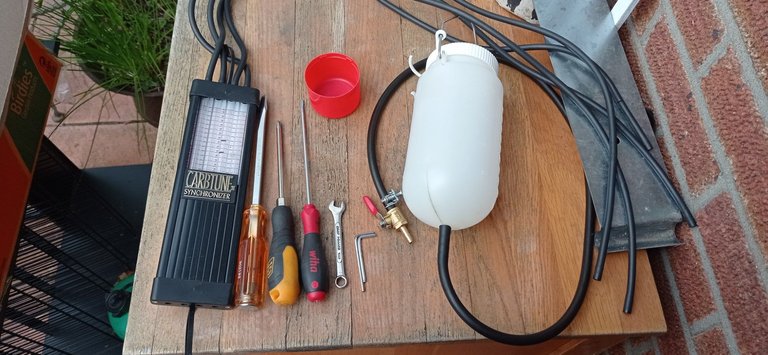
The tools above include a remote fuel tank, carb synchroniser, an 8mm spanner, two small allen keys of different lengths, and three screwdrivers (the small flat-head for the throttle adjuster and air screws, the monster flat head for float bowl and air pod screws, and the Phillips head mostly because it's got a magnetic tip just in case I drop anything !) The red thing is the cap off an old aerosol can - unusually, it hasn't got an air hole, and is the ideal shape for when I need to drain fuel from a float bowl.
Before starting, I checked that the air screws were in the factory-recommended initial position of one and a quarter turns out. They won't end up there, but that's a fine-tuning adjustment for another day ! Note the dots I made with a Sharpie to help me get this position exactly right; it's quite a sensitive adjustment.
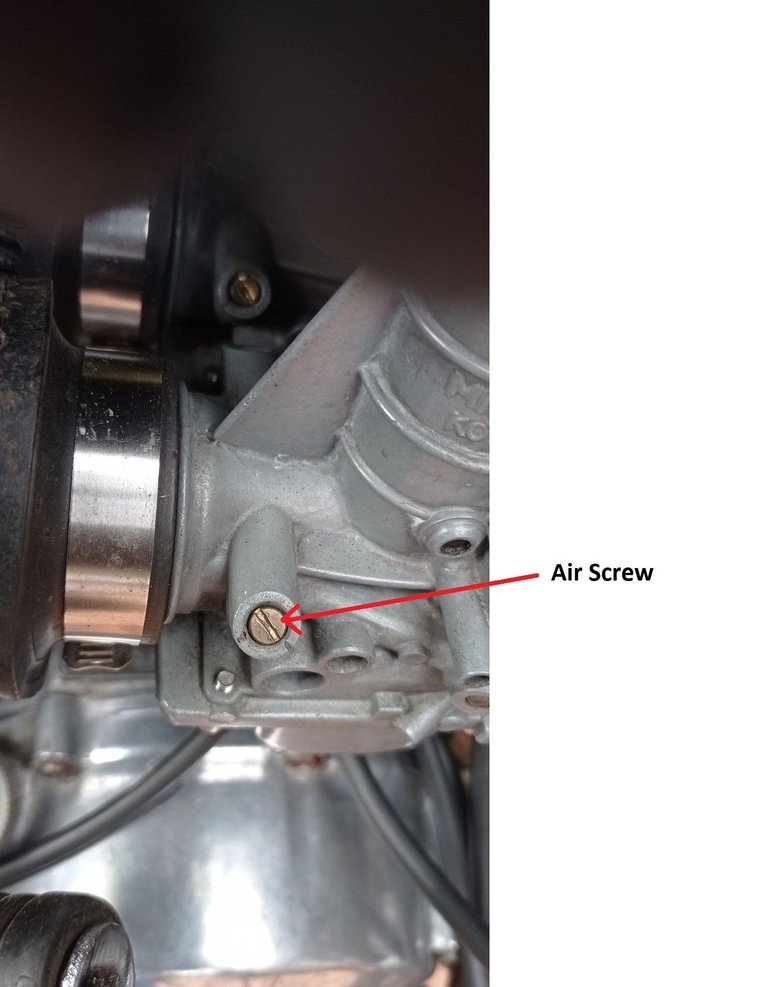
First step is to start the bike and warm the engine up. Then adjust tick-over to about 1100-1200 RPM. The manual says 950-1050, but at this stage the bike isn't running smoothly enough to tolerate that.
Once it's warmed up, I can remove the inlet manifold plugs. There are four of them, one for each cylinder.
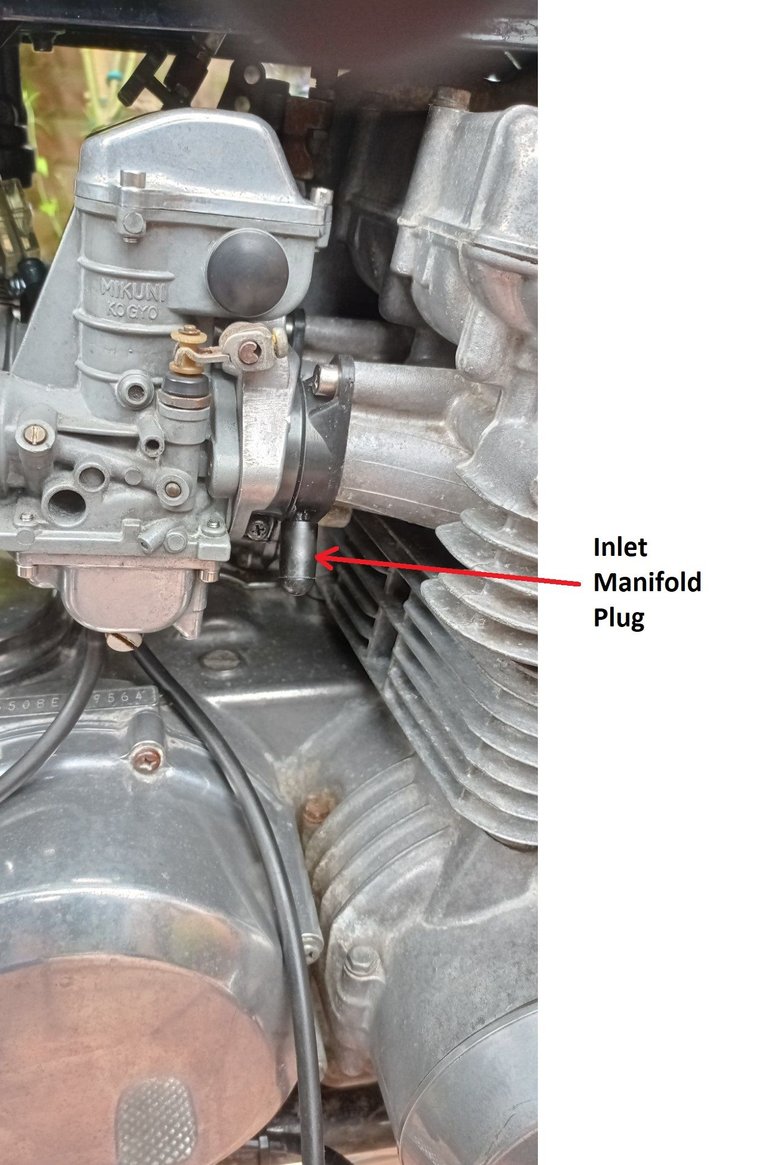
This reveals the brass spigot onto which the carb synchroniser tubes are attached. It's important at all times (whether with the carb synchroniser on or the plugs) that these are absolutely airtight. Any air leak at all will cause huge problems !
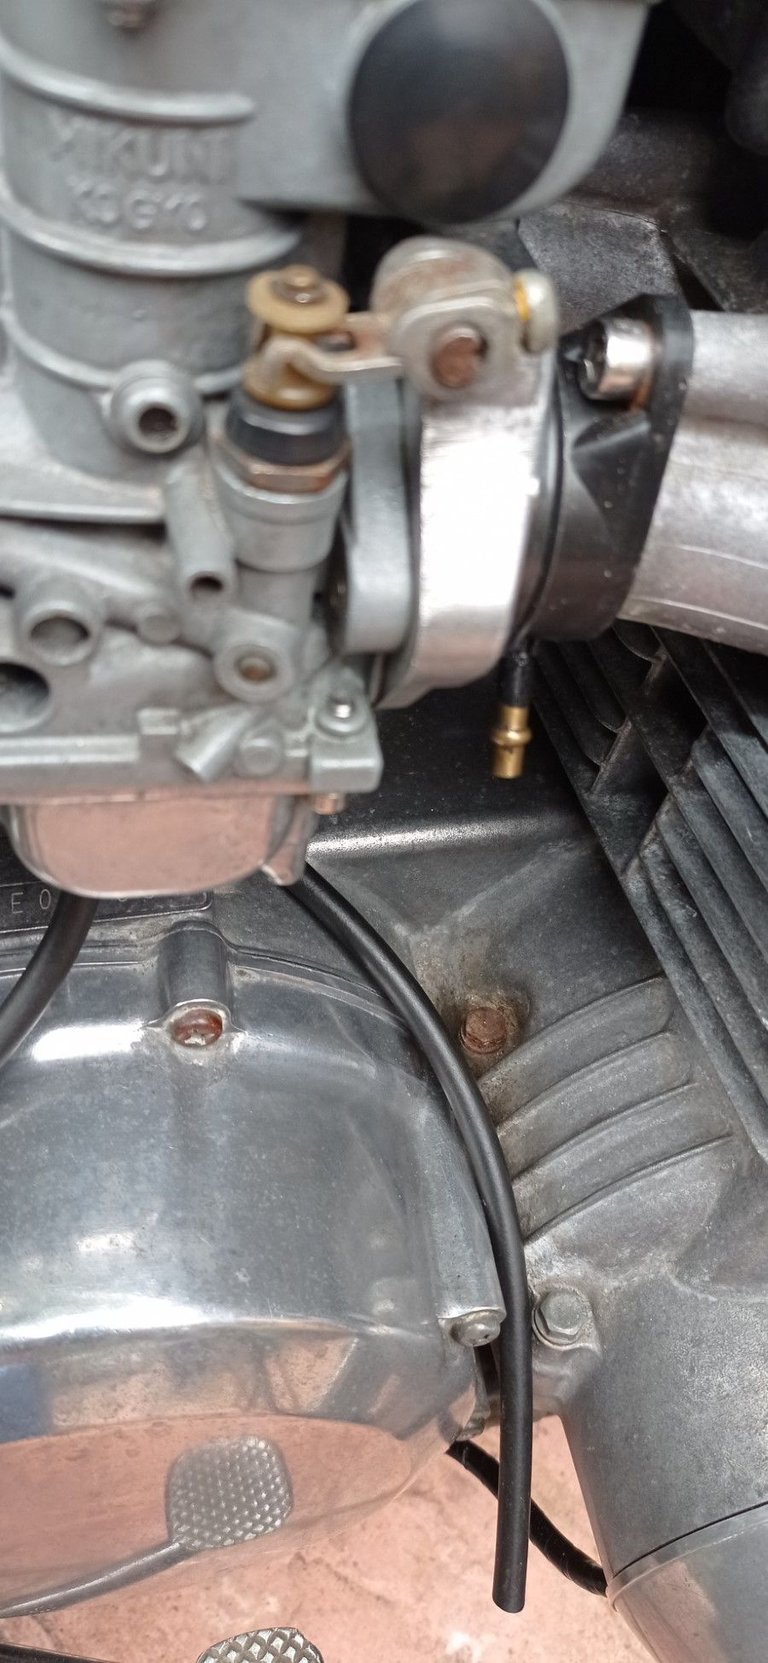
Below is the carb synchroniser hooked up ready for testing. It's worth noting that this design of tester can be hung either way up; hanging it upside down is useful when measuring very low vacuum readings (below around 8cm Hg), for example on BMW twins.
The "cm Hg" measure originates from when vacuum gauges used mercury, and vacuum is measured according to how many centimetres it can lift mercury in a tube. Nowadays, they use carefully calibrated steel rods, which might drive you mad if you can't get them to give you the readings you want, but won't make you mad from drinking them or breathing the fumes....
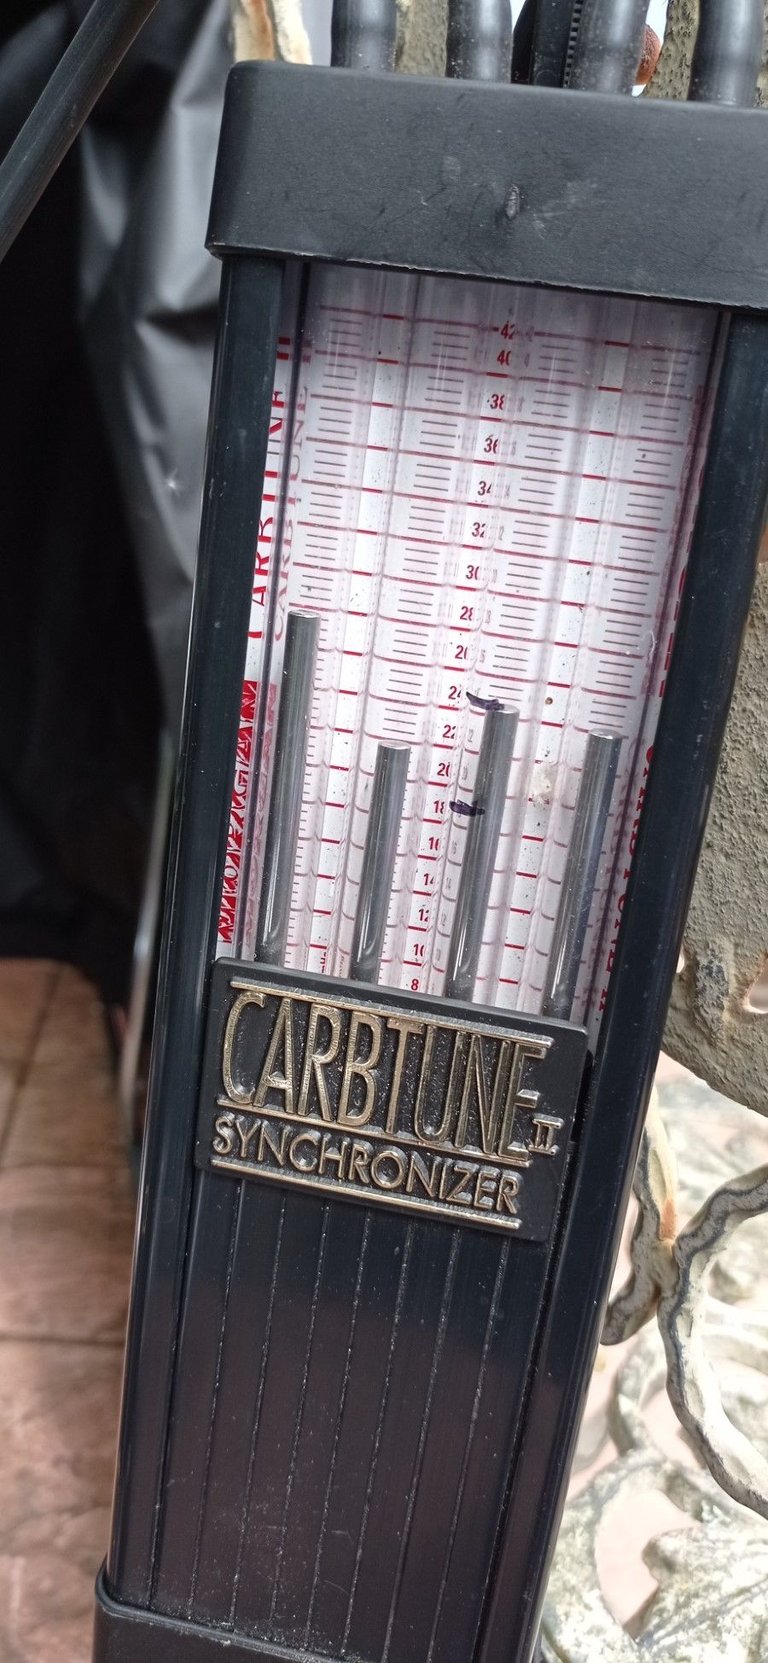
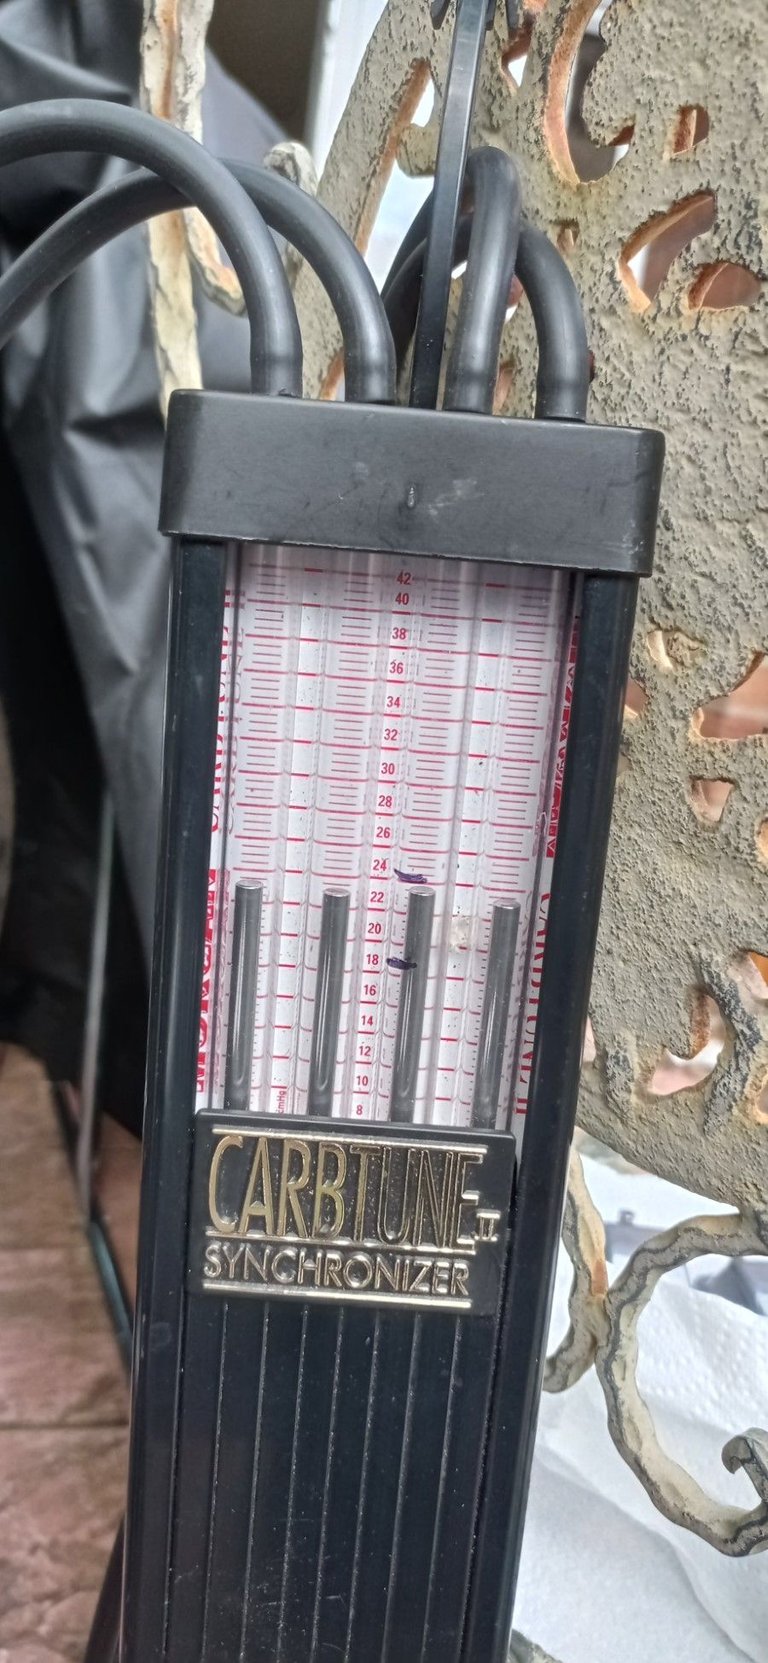
The manual specifies that normal vacuum reading should be from 19-24cm Hg and no more than 2cm Hg difference between the four cylinders. You can see I've marked the gauges with a Sharpie to show the range I'm aiming for, and I'm going to try for closer than 2cm Hg between cylinders !
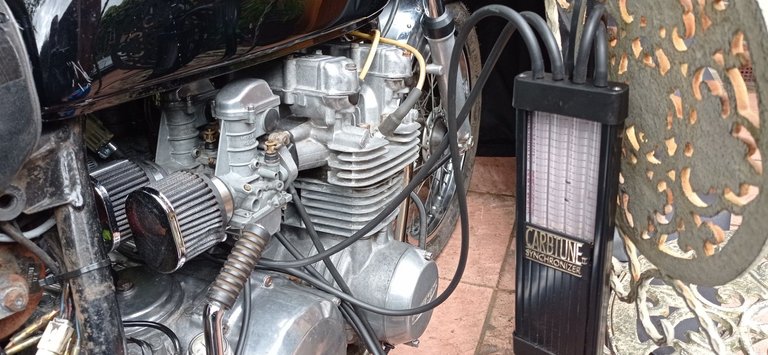
With the engine now warmed up, I took some initial readings. As you can see in the photo below, the balance between cylinders wasn't great. No wonder it was coughing and spluttering !
Next step was to remove the fuel tank and set up the remote one (which I hung from a convenient tree branch !). This allowed me to remove the carburettor tops and access the adjuster screws. The screws are each held in place by an 8mm locknut. It's essential to use the flat head screwdriver to hold the screws in position when loosening or tightening the locknut. I had to go back and re-do a step a few times because the screw moved slightly. It's very, very sensitive !
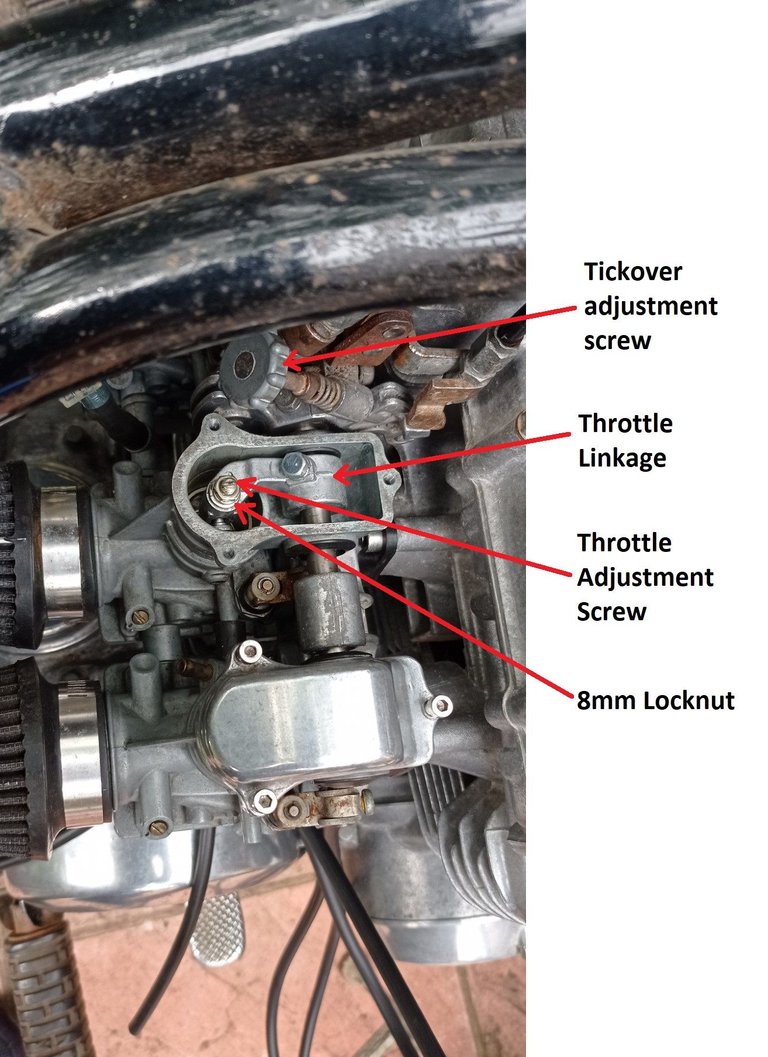
The actual adjustment process is basically a case of making tiny adjustments on the screws until all four cylinders come into balance. Sounds easy, doesn't it !
Something I had been told, which worked really well for me, was to balance the two nearest cylinders against each other first, then balance the two further ones against each other, and then make tiny adjustments to both in each pair until the two pairs came to agree with each other.
After each adjustment, I gave the engine a small blip of the throttle and allowed it to settle before making the next adjustment.
Actually, at this point I discovered a problem which is best summed up as "listen to experts on forums but don't blindly assume they are always right".
Quite a few people on KZRider (the main forum I use) suggested that with the setup I've got of an aftermarket Motad exhaust and K&N pod air filters I need to up-size the pilot jet from 15 to 17.5. So I'd done that. The issue was that to get the vacuum in range, I had to undo the adjustment screws so far that the locknut wouldn't tighten up enough to lock them in position.
So I swapped the jets back to standard. It meant taking the carbs off the bike, float bowls off and swapping the jets over, then starting the synchronisation from scratch. But it worked. Thank goodness.
After a bit more tweaking, and being very, very careful not to accidentally turn the adjusting screws even a little bit when I tightened the locknuts, I was able to get the reading below. Definitely a lot closer than 2cm Hg difference between cylinders !
Next job will be to set the air screws just right.... but that's for next time 😀
I really don't know anything about mechanics, but I have learned from listening to my husband and other friends that it is very important to keep our vehicles up to date with maintenance and the necessary adjustments, that it is not enough to put gas and water, we must be attentive to the oil and the tune-ups required after a certain mileage or time.
@riesakashiya This is your sort of thing right!